


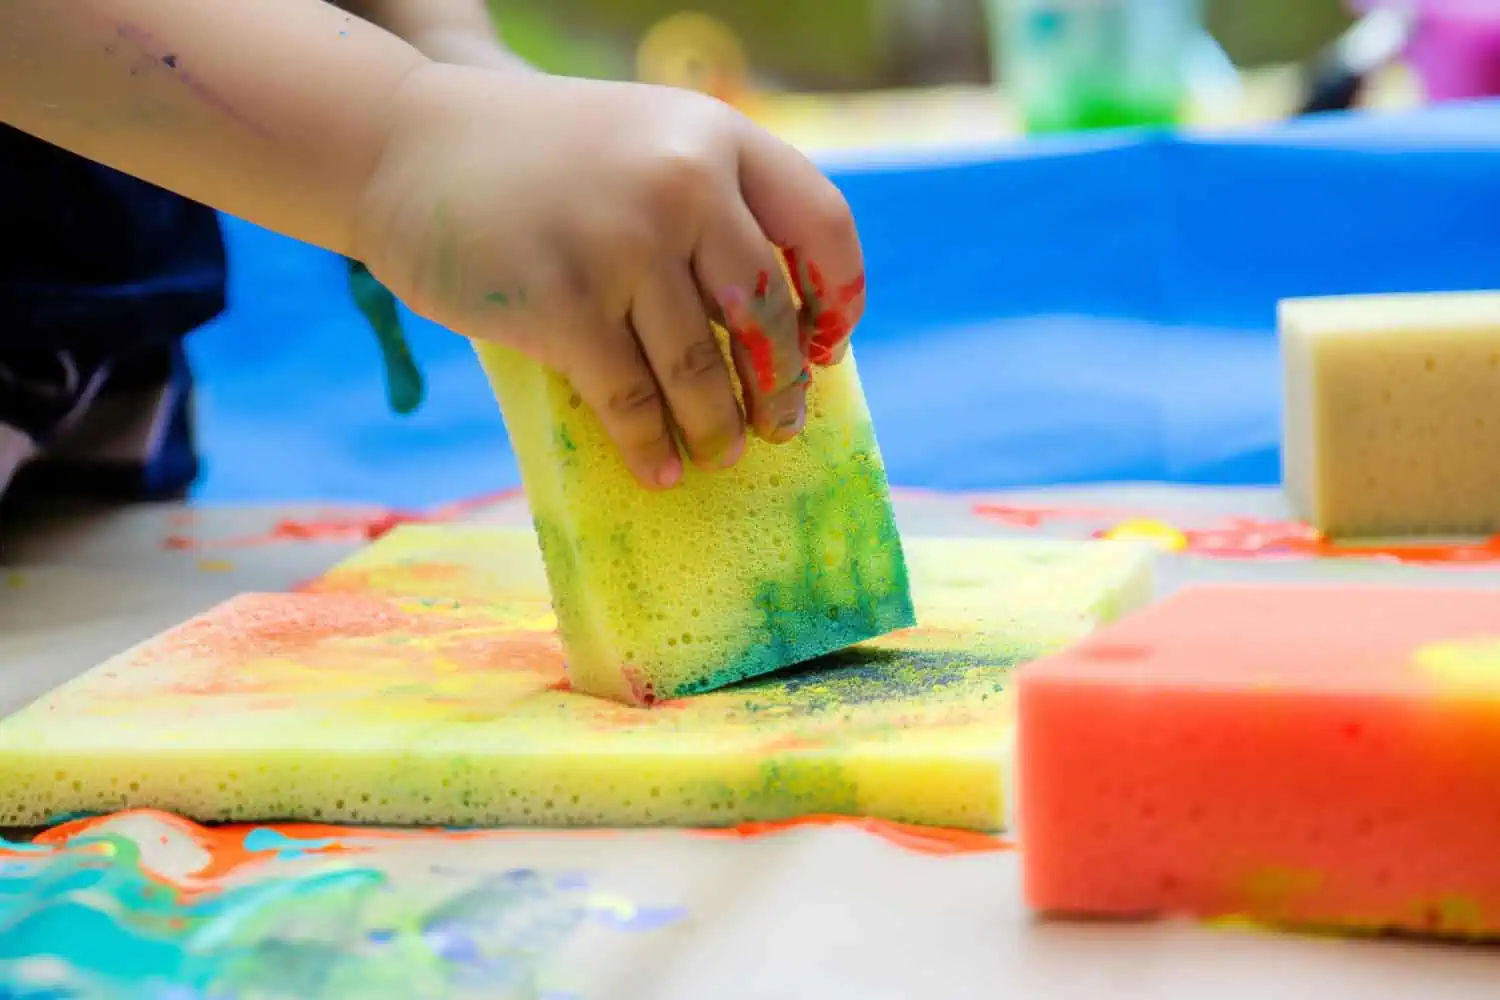


Sponge painting for kids is an art activity where children use sponges instead of paintbrushes to create colourful designs and textures. By dipping a sponge in paint and dabbing it onto paper, they create patterns, shapes, and other artwork without advanced drawing skills.
In this guide, we’ll cover what sponge painting is, why children enjoy it, its benefits, and several sponge painting ideas for kids that you can easily try at home or in the classroom.
What Are the Benefits of Sponge Painting for Kids?
Sponge painting allows children to explore colours and shapes freely while enjoying a hands-on art experience.
They may enjoy sponge painting for several reasons:
- It is simple and does not require perfect drawing skills.
- The sponge automatically creates interesting textures and prints.
- The activity is well-suited for toddlers and preschoolers.
- Beyond fun, sponge painting also supports important developmental skills.
Here are some of the most necessary skills they can develop:
- Fine Motor Skills: Children practise gripping and pressing the sponge while painting.
- Hand-Eye Coordination: They learn to control where they place the paint.
- Creativity & Colour Recognition: Children experiment with colours, patterns, and designs.
- Sensory Exploration: The soft, squishy sponge texture provides a tactile learning experience.
10 Fun, Easy & Creative Sponge Painting Activities for Kids
Tape-Resist Sponge Painting
What You’ll Need:
- Thick paper or chart paper
- Painter’s tape or masking tape
- Sponges
- Washable paints
- Paint trays
How to Do It:
- Place strips of tape on the paper to create patterns or geometric shapes.
- Ask children to dab paint all over the canvas, including the tapes, using sponges.
- Once the paint dries, remove the tape to reveal clean patterns underneath.
Rainbow Sponge Painting
What You’ll Need:
- Sponges
- Red, orange, yellow, green, blue, and purple paint
- Paper sheets
- Paint trays
How to Do It:
- Cut sponges into semicircle shapes.
- Children dip the sponge into different paint colours and stamp them in an arc pattern to create a rainbow design.
Kaleidoscope Sponge Prints
What You’ll Need:
- Sponges cut into geometric shapes
- Washable paints
- Paper
- Paint plates
How to Do It:
- Children dip the sponge shapes into paint and stamp repeating patterns across the paper.
- The overlapping shapes create colourful kaleidoscope-style prints.
Winter Landscape Sponge Art
What You’ll Need:
- Blue or dark paper
- White and light blue paint
- Sponges
- Cotton buds
How to Do It:
- Children use sponges to dab white paint onto the paper to create snowy textures.
- Cotton buds can be used later to add details such as snowflakes.
Butterfly Sponge Printing
What You’ll Need:
- Rectangular kitchen sponge
- Elastic band
- Washable paint
- Paper or chart paper
- Marker or sketch pen
How to Do It:
- Wrap an elastic band around the centre of the sponge to create two wing shapes.
- Dip the sponge lightly into paint and press it onto paper to print the butterfly wings.
- Once the paint dries, draw the butterfly’s body and antennae using a marker.
Heart Name Sponge Art
What You’ll Need:
- Kitchen sponge
- Scissors
- Washable paint
- Paper or cardstock
- Paint plate or tray
- Marker
How to Do It:
- Cut a heart shape from the sponge.
- Dip the sponge into paint and stamp heart shapes across the paper.
- Allow the paint to dry completely, and then write a name in the centre or across the heart design using a marker.
Sponge Finger Painting
What You’ll Need:
- Small sponge pieces or sponge shapes
- Washable paint
- Paper
- Paint plates or trays
How to Do It:
- Cut sponges into small pieces or simple shapes, and pour paint onto shallow plates for easy dipping.
- Let kids hold the sponge between their fingers, dip it lightly into paint, and dab it onto the paper.
- Encourage them to tap, twist, or drag the sponge to create different textures and patterns.
Autumn Leaf Sponge Painting
What You’ll Need:
- Sponges
- Scissors
- Orange, red, yellow, and brown paint
- Paper or chart paper
- Paint plate or tray
How to Do It:
- Cut the sponges into simple leaf shapes. Dip them lightly into the paint and dab them onto the paper to create leaf prints.
- Use different autumn colours to layer the leaves and create a fuller effect.
- Once the paint dries, you can add small details such as stems or branches using a marker or paint.
Shape Christmas Tree Sponge Art
What You’ll Need:
- Kitchen sponges
- Scissors
- Green and brown paint
- Paper
- Paint plates or trays
- Cotton buds or stickers for decoration
How to Do It:
- Cut sponges into triangle shapes to create the tree layers.
- Dip the triangle sponge into green paint and stamp it onto the paper to form the tree.
- Use a small sponge dipped in brown paint to stamp the trunk.
- Decorate the tree with small dots of paint using cotton buds or add stickers.
- Finish by adding a star at the top.
DIY Sponge Paint Brushes
What You’ll Need:
- Kitchen sponges
- Wooden sticks or clothespins
- Rubber bands
- Paint
How to Do It:
- Attach sponge pieces to sticks or clothespins using rubber bands.
- Children can use these homemade tools to explore a variety of easy sponge-painting textures.
Helpful Tips for Doing Sponge Painting with Kids
- Choose washable and child-safe paints so cleaning up after the activity is easier.
- Cut sponges into simple shapes such as circles, leaves, or hearts to make the prints more interesting.
- Attach the sponge to clothespins or tongs so children can hold it more easily and keep their hands cleaner.
- Pour small portions of paint into trays or plates to reduce spills and waste.
- Show children how to gently dab the sponge on the paper instead of dragging it for clearer prints.
- Use thicker paper or chart paper so the paint does not tear or wrinkle the sheet.
- Keep a bowl of water nearby so sponges can be rinsed when switching colours.
- Place an old towel nearby to quickly clean paint from surfaces.
- Encourage children to mix colours and experiment with patterns while painting.
FAQs
What do children learn from sponge painting?
Sponge painting helps kids explore textures, colours, and patterns through sensory play. While using sponges to dab paint, they practise hand control, develop creativity, and strengthen fine motor skills.
What is the sponging activity for kids?
A sponging activity usually involves transferring water or paint using a sponge. Children squeeze the sponge, absorb liquid, and release it in another container or on paper.
Why is sponge painting good for toddlers?
Sponge painting for toddlers works well because the soft sponge is easy for their small hands to grip and press. They can simply dip the sponge into paint and stamp it on paper, which helps them practise hand control and coordination. It also lets them explore colours, textures, and patterns.


Subscribe to our newsletter
[contact-form-7 id="12706" title="Newsletter Form for post page"]Our Related Blogs
Yoga Benefits, Activities, and Poses for Preschoolers
For preschoolers, yoga isn’t about perfection but about giggles and benefits. So, are you curious how a simple stretch can support a child’s focus, flexibility, and emotional well-being? Let’s roll...
Year-End Reflection and Goal Setting for Children
Parenting is a journey filled with the brightest moments and valuable lessons, both for us and our children. As the year draws to a close, it’s the perfect time to...
Work-Life Balance Solutions for Parents in Emerald Hills Rd, Sector 65, Gurugram: The KLAY Daycare Advantage
Finding the perfect balance between professional commitments and parenting is a challenge for many working families in Gurugram. Parents in Emerald Hills Rd, Sector 65, especially, look for childcare solutions...